

The
mandatory registration of Subscriber Identity Module (SIM) in the country began
yesterday. All of the telecommunication companies are required to provide
platforms to all SIM owners to do the process. I was able to register my Smart
prepaid SIM. I am going to share how I did it and my experience as well.
I utilized
my laptop computer in registering. So, what you are going to see here are the
screenshots I took using the device. If you are going to use smartphone or
tablet, do not worry if there is a difference in terms of screen orientation.
The sequence of the electronic form is same.
READ: How to Register Globe and TM Prepaid SIM
Here is the
step- by- step process:
I used
Google Chrome for the entire activity. There are two links provided by Smart
Communications, Inc. When I accessed for the first time at 10:39 AM, 502 Bad
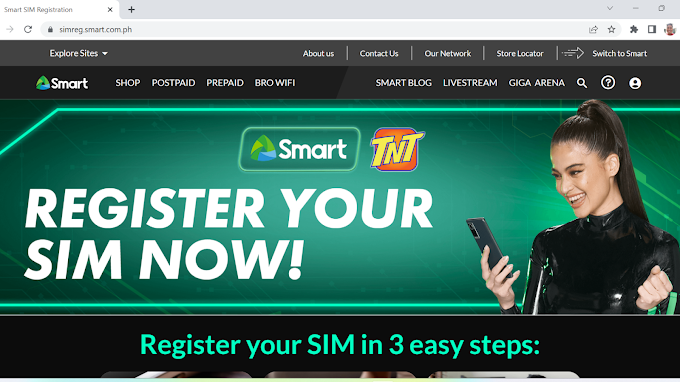
Gateway appeared. If this happens, reload the site. Below is the welcome page
dedicated for the SIM registration. I saw the said page at 10:50 AM.
The site
states that you need to do the three easy steps:
Step 1: Get
your PIN- you will receive a One-Time Password (OTP) after you enter your mobile
number.
Step 2:
Input your Information- you need to provide your personal information and ID
number. You will also upload photos of your ID and your selfie.
Step 3:
Wait for SMS Confirmation- you will get your control number. You will receive a
text message or a call about the successful process.
2. Scroll down and type in your 11- digit mobile number.
The SEND OTP button will change
color. Tick the box acknowledging that you have read and understood the Terms
and Conditions, and Smart’s Privacy Notice. Once done, click the button.

3. Check your phone for the OTP.
You have two minutes to verify the OTP. After encoding the
OTP, press the colored VERIFY OTP button. A box showing Success! Your mobile
number was successfully verified shall appear on the screen. Click OK.

4. Identify the type of registration and provide personal information.
There are four choices under the type of registration: I’m
registering a newly bought SIM, I’m registering my old SIM, I’m registering a
newly bought SIM for a minor, and I’m registering an old SIM for a minor. In my
case, I chose the second choice.

For
Nationality, choose Philippines. The system has automatically set it as a
choice. So, there is no need to change if you are a Filipino. Enter your First
Name, Middle Name, and Last Name. For your birthday, press the down arrows
Month, Date, and Year. Then, press the down arrow about Sex. After that, choose
the ID card and enter the ID number. I opted to use my PRC ID. The system asks
for the front and back scanned files of the ID. Selfie is a requirement when
registering. I took my picture using my phone and sent it to my laptop for
downloading. I uploaded the three needed images. The website allows images with
maximum of 5 MB size.


After supplying
the needed data, click Next.
5. Provide address information.
You need to give your present or official home address. You are required
to provide your province, city/ municipality, barangay, and ZIP code. These are
answerable by pressing down arrow buttons. House/Lot number, street, village/
subdivision, unit/ floor, building have no asterisks so I presumed these are
not marked as required. In my case, I only answered the house number. Smart is
asking you to enter alternate contact information. You need to encode another
phone number/ landline and email address. After filling out, click Next.


6. Attest the accomplishment of registration and truthfulness of supplied information.
The summary
of the information you supplied will appear. You need to attest that you
personally accomplished the registration. You will also be asked to attest the truthfulness
of the data you provided and uploaded. Tick the box about these. You have also
the option to tick the box if you want to receive promotions and offers from
Smart. Click Next. A thank you message shall appear on the screen.
The process
tested my patience. The site was slow to load. It was understandable as there
are many Filipinos who were trying to register during the first day. Providing
the needed information was easy as there are down arrows for options. I hope
Smart will add more minutes for OTP verification as two minutes could be short
for the places where Internet is sluggish. I also love the 5 MB size limit for
the pictured. I didn’t need to compress the photos. I just pray that I did the
process correctly. I hope there is no resubmission of photos.

If you have
queries you can go to Smart website as there is Frequently Asked Questions dedicated
to SIM registration.


0 Comments